⚠️ Obfuscate Your USDT Like a Pro
Privacy is not a luxury — it’s a necessity. 👁️🗨️
USDT Mixer gives you the tools to hide your on-chain tracks, instantly.
No data. No identity. No trace. Just pure crypto freedom.
What Is a Mixing Setup?
A mixing setup is the collection of hardware, software, and acoustic tools used to balance, refine, and polish audio tracks into a cohesive final product. Whether you’re a music producer, podcaster, or sound engineer, a well-designed mixing setup ensures clarity, depth, and professional-quality results. This guide breaks down everything you need to create an efficient mixing environment.
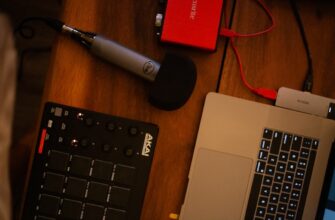
Essential Components of a Mixing Setup
- Digital Audio Workstation (DAW): Software like Pro Tools, Logic Pro, or Ableton Live for editing and processing audio.
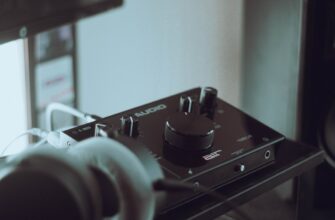
- Audio Interface: Converts analog signals to digital (e.g., Focusrite Scarlett, Universal Audio Apollo).
- Studio Monitors: Flat-response speakers (e.g., Yamaha HS Series, KRK Rokit) for accurate sound reproduction.
- Headphones: Closed-back models (e.g., Audio-Technica ATH-M50x) for detailed tracking and mixing.
- MIDI Controller: For virtual instrument control and automation (optional but recommended).
- Acoustic Treatment: Bass traps, diffusers, and foam panels to minimize room reflections.
- Plugins: EQ, compression, reverb, and mastering tools (e.g., Waves, FabFilter).
- Cables & Accessories: XLR, TRS, and USB cables, plus monitor isolation pads.
Step-by-Step Guide to Building Your Mixing Setup
- Choose Your DAW: Pick software that aligns with your workflow and budget.
- Set Up Your Audio Interface: Connect it to your computer and studio monitors.
- Position Studio Monitors: Place them at ear level, forming an equilateral triangle with your listening position.
- Install Acoustic Treatment: Focus on first reflection points and bass buildup areas.
- Connect Peripherals: Link MIDI controllers, microphones, and headphones.
- Configure DAW Settings: Set sample rates, buffer sizes, and input/output routing.
- Test Your Setup: Play reference tracks to check balance and clarity.
- Start Mixing: Organize tracks, apply effects, and refine levels.
Tips for an Optimal Mixing Setup
- Invest in quality studio monitors over consumer speakers.
- Calibrate monitor volume to 75-85 dB for accurate frequency perception.
- Use reference tracks to compare your mix to professional releases.
- Label cables and keep your workspace organized.
- Take breaks to avoid ear fatigue during long sessions.
Common Mixing Setup Mistakes to Avoid
- Mixing in an untreated room (causes frequency imbalances).
- Using low-resolution MP3s as source files.
- Cranking volume levels, which distorts perception.
- Overloading the mix with too many plugins.
- Skipping backup saves during projects.
Mixing Setup FAQ
Q: What’s the most important part of a mixing setup?
A: Studio monitors and acoustic treatment – you can’t fix what you can’t hear accurately.
Q: Can I use regular headphones for mixing?
A: Closed-back studio headphones are better for detail, but open-back models offer a wider soundstage.
Q: How much does a basic mixing setup cost?
A: A budget-friendly setup starts around $500 (DAW + interface + headphones), while pro setups exceed $5,000.
Q: Do I need acoustic treatment if I use headphones?
A: Treatment isn’t critical, but it improves recording quality and reduces bleed.
Q: How long does it take to set up a mixing studio?
A: Allow 2-3 hours for initial setup, plus ongoing tweaks as you learn your space.
⚠️ Obfuscate Your USDT Like a Pro
Privacy is not a luxury — it’s a necessity. 👁️🗨️
USDT Mixer gives you the tools to hide your on-chain tracks, instantly.
No data. No identity. No trace. Just pure crypto freedom.